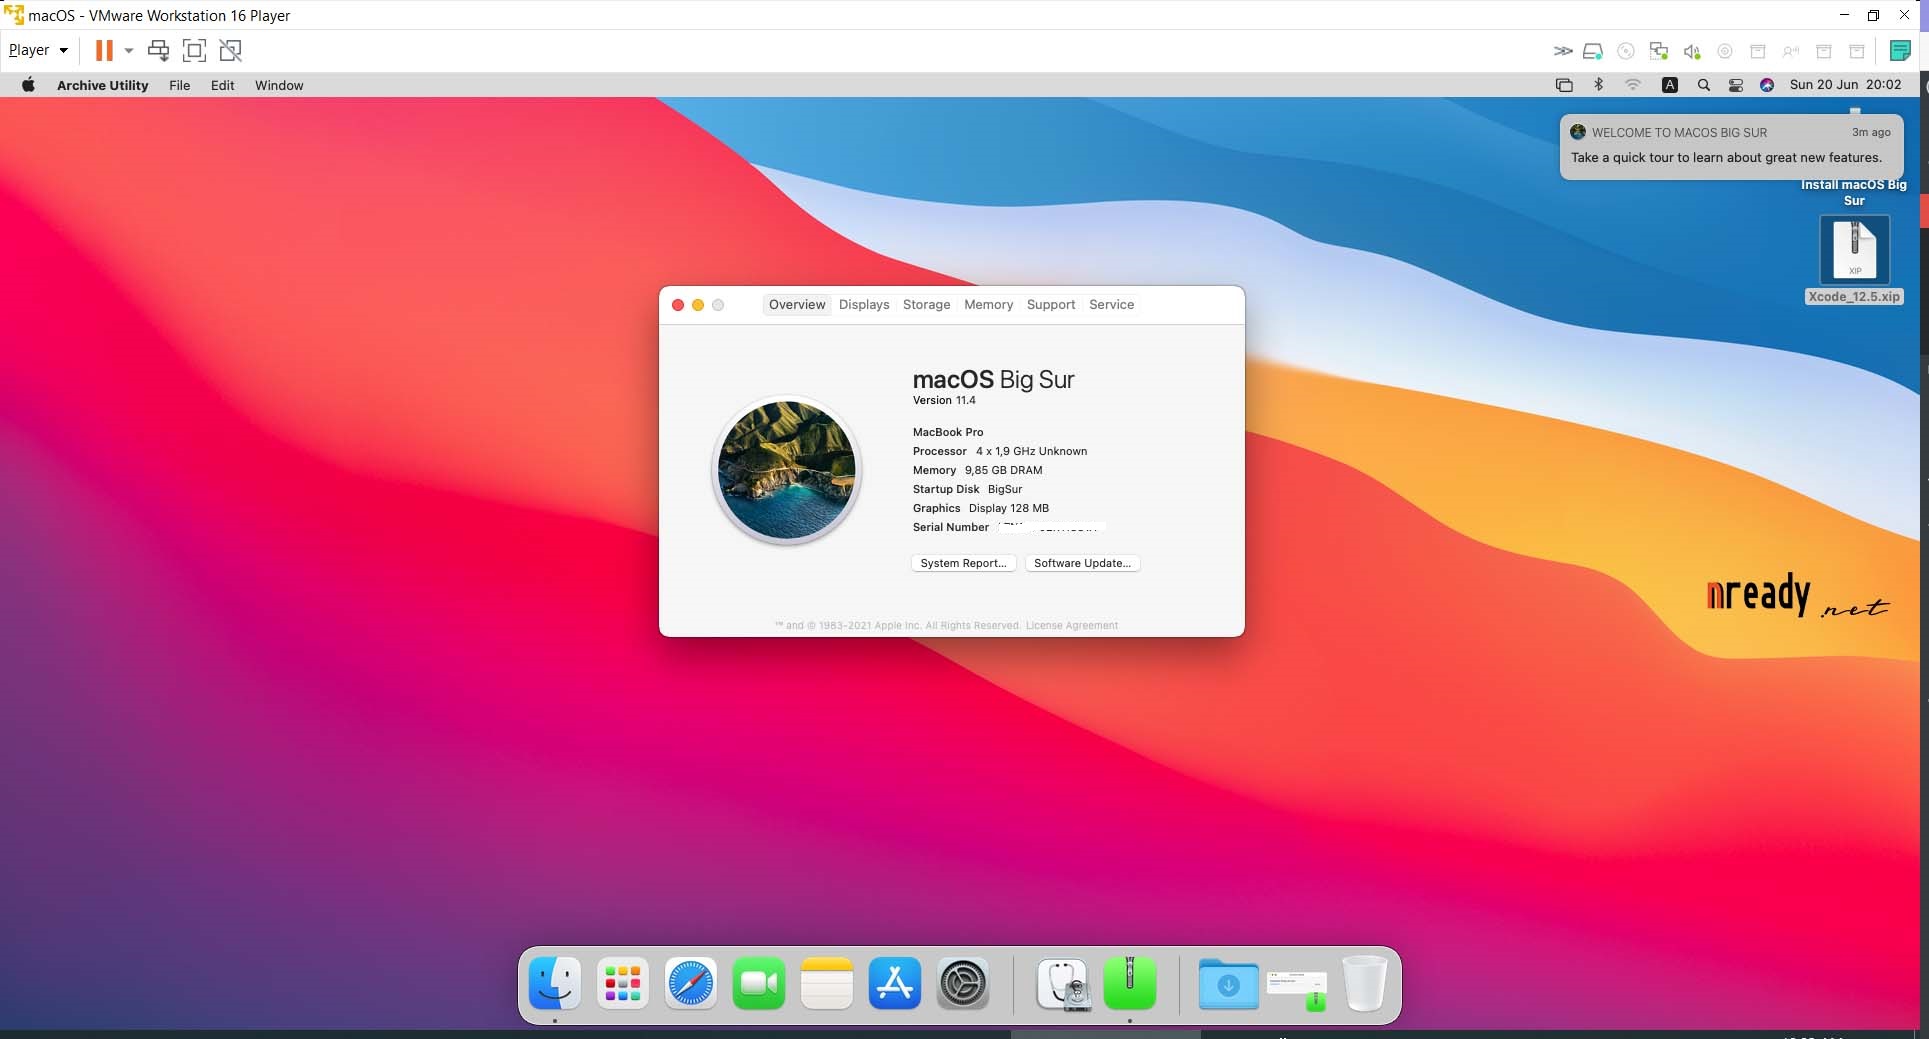
As the previous post Install MacOS Catalina On VMware AMD Laptop, I have upgrade my macOS Catalina VMWare to the BigSur. During upgrading, I have backed-up a copy of VMDK macOS BigSur. Below is my new laptop specìication:
- ASUS Zenbook UM425IA-NH74
- AMD Ryzen 7 4700U Processor (8M Cache, up to 4.1 GHz)
- 1 TB PCIe NVMe Intel SSD
- 16 GB LPDDR4X RAM Dual chanel
- Windows 10 Professional included
Prerequisites
- CPU also needs to support the SSE4.1 and AMD-V
- Donwload the VMware Player /Workstation Pro 16
- VMware Unlocker: https://github.com/DrDonk/unlocker
- My BigSur VMDK on Mediafire:
https://www.mediafire.com/folder/johotiq679ljn/vm-mac-AMD-BigSur_-_vmdk , password to login: !1234 - WinRAR or 7-zip to extract and join 5 parts BigSur VMDK on Mediafire
Configure the VMWare
- Install the VMWare as your way, either Player or Workstation will be fine.
- Run the Unlocker by running the
win-install.cmdwith Administrator right. - Open VMWare, create a new VM, Select
Apple Mac OS Xunder Guest operating system and choose "macOS 10.15" under Version. Leave all the option to the default. We will update the Hard Disk later. - Click on Finish once finished.
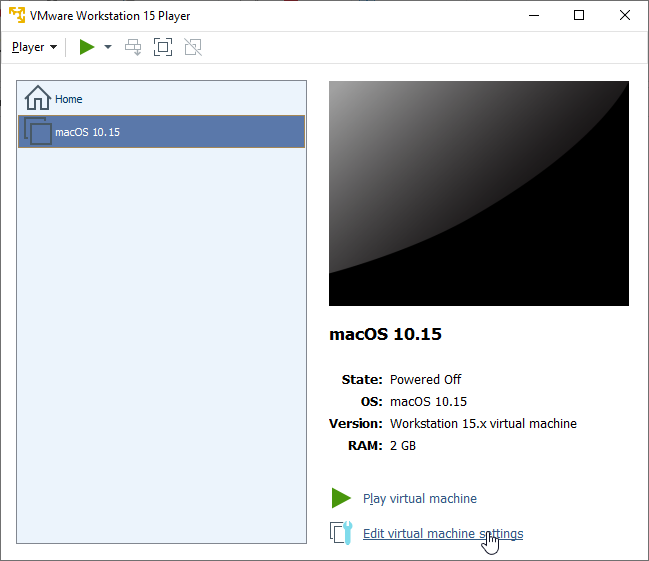
- Update the Hard Disk by Click on Edit virtual machine settings.
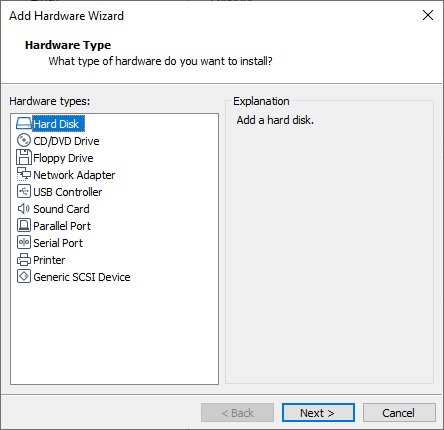
- Add a new Hard Disk by click on Add.. -> Hard Disk
- Select SATA -> Use an existing virtual disk
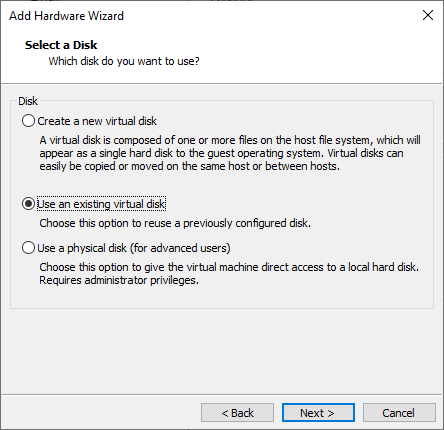
- Choose the VMDk that I provided in the #Prerequisites. Click on Ok when Finished.
- The VM will start normally.
Nam Le, https://nready.net
14 responses to “Run macOS BigSur VMWare on AMD Laptop”
Says CPU has been shut off by guest OS. Doesnt boot.
Thank Lannie for visiting my blog.
Apple doesn’t support installing macOS on non-Apple hardware and AMD systems are different from Intel so we have to do some trick. For the error CPU has been shut off by guest OS, you can follow here to fix: https://nready.net/?p=1255
Stuck on apple logo for me…
Bác quăng lên mega hoặc gg drive được không bác? MediaFire tải chậm ì.
Thanks for the great tutorial!
I have a ryzen 3600x and using vmware worksatation 16 player (16.2.2). If i dont add your snippet from the link p=1255, I get the error CPU Disabled.
If I add the snippet:
smc.version = “0”
cpuid.0.eax = “0000:0000:0000:0000:0000:0000:0000:1011”
cpuid.0.ebx = “0111:0101:0110:1110:0110:0101:0100:0111”
cpuid.0.ecx = “0110:1100:0110:0101:0111:0100:0110:1110”
cpuid.0.edx = “0100:1001:0110:0101:0110:1110:0110:1001”
cpuid.1.eax = “0000:0000:0000:0001:0000:0110:0111:0001”
cpuid.1.ebx = “0000:0010:0000:0001:0000:1000:0000:0000”
cpuid.1.ecx = “1000:0010:1001:1000:0010:0010:0000:0011”
cpuid.1.edx = “0000:1111:1010:1011:1111:1011:1111:1111”
featureCompat.enable = “FALSE”
smbios.reflectHost = “TRUE”
hw.model = “MacBookPro14,3”
board-id = “Mac-551B86E5744E2388”
(i checked the quotes)
If fails with the error:
Error while powering on: Failed to start the virtual machine
Any ideas?
Found the solution here (its booting now):
https://www.geekrar.com/how-to-fix-the-cpu-has-been-disabled-by-the-guest-os/
change cpuid.1.edx
from “0000:1111:1010:1011:1111:1011:1111:1111”
to “0000:0111:1000:1011:1111:1011:1111:1111”
Hallo Marcos.
Thanks for visiting my blog. I have double-checked with my working vmx, cpuid.1.edx need to change as your comment. I have updated on https://nready.net/?p=1255.
This works well for me by updating the vmx with the tip you give :
smc.version = “0”
cpuid.0.eax = “0000:0000:0000:0000:0000:0000:0000:1011”
cpuid.0.ebx = “0111:0101:0110:1110:0110:0101:0100:0111”
cpuid.0.ecx = “0110:1100:0110:0101:0111:0100:0110:1110”
cpuid.0.edx = “0100:1001:0110:0101:0110:1110:0110:1001”
cpuid.1.eax = “0000:0000:0000:0001:0000:0110:0111:0001”
cpuid.1.ebx = “0000:0010:0000:0001:0000:1000:0000:0000”
cpuid.1.ecx = “1000:0010:1001:1000:0010:0010:0000:0011”
cpuid.1.edx = “0000:0111:1000:1011:1111:1011:1111:1111”
smbios.reflectHost = “TRUE”
hw.model = “MacBookPro14,3”
board-id = “Mac-551B86E5744E2388”
When starting the username is NamLe. You didn’t provide the password, what is it ?
Thanks.
**Really** annoying to spend nearly 6 hours downloading the disk only to find it password-protected. Any hints?
Alright, I amend my previous post, the password hint is the actual password.
It would be nice though if you mentioned that in the post.
Thanks for the good tutorials.
Hi Ticked Off,
Thanks for your recommendation. I’ve updated the pwd on the blog post.
it worked thank you!
but can you please help with increasing Vram from128mb to 256mb
Hmm, when I add the downloaded and uncompressed .vmdk it just gives me “internal error” and fails to do anything else. Also, VMware created a hard drive when I followed your steps. Do I just delete this or copy the uncompressed contents over? Thanks for this awesome guide, by the way!
OK, I fixed it. It needs to be set as macOS 10.13 not 10.15. If I do this, then everything works as expected. Thanks!